


Are you a dog lover like me?
If so, I’m sure you’ll absolutely love making this cute, comfy dog cushion for your furry friend!
Get the FREE web-based Dog Cushion pattern by scrolling down the post
Subscribe to You Can Crochet Newsletter
Get free tutorials, tips and tricks to your inbox every month. Unsubscribe any time.

Dog Cushion Pattern options
This dog cushion pattern is a free crochet pattern in US terms (with a UK stitch conversion table) available for everyone, just scroll down to find it. As with all free patterns on the blog, there are adverts every now and then, and the pattern isn’t optimized for printing directly from the web.
If you prefer an ad-free printable pattern you can purchase it here
Purchase and Print
Get the ad-free printable pdf, with video tutorials.

Other patterns you might like
I have a few other patterns you might fancy making too. The shoulder bag style is my absolute favourite as it’s so easy to carry and fits loads in.

Ladder Vest Top
This light and airy vest top is the perfect beach cover up and looks great with shorts and a bikini top, make it plain or stripy!

Striped Shopper Bag
This stylish shopper is so easy to make and perfect for throwing a towel and a book in to take to the beach. It also makes a great shopping bag!

Kid’s Hooded Poncho
This cute poncho works great as a beach towel or a warmer layer for Winter.
Yarn & Hook
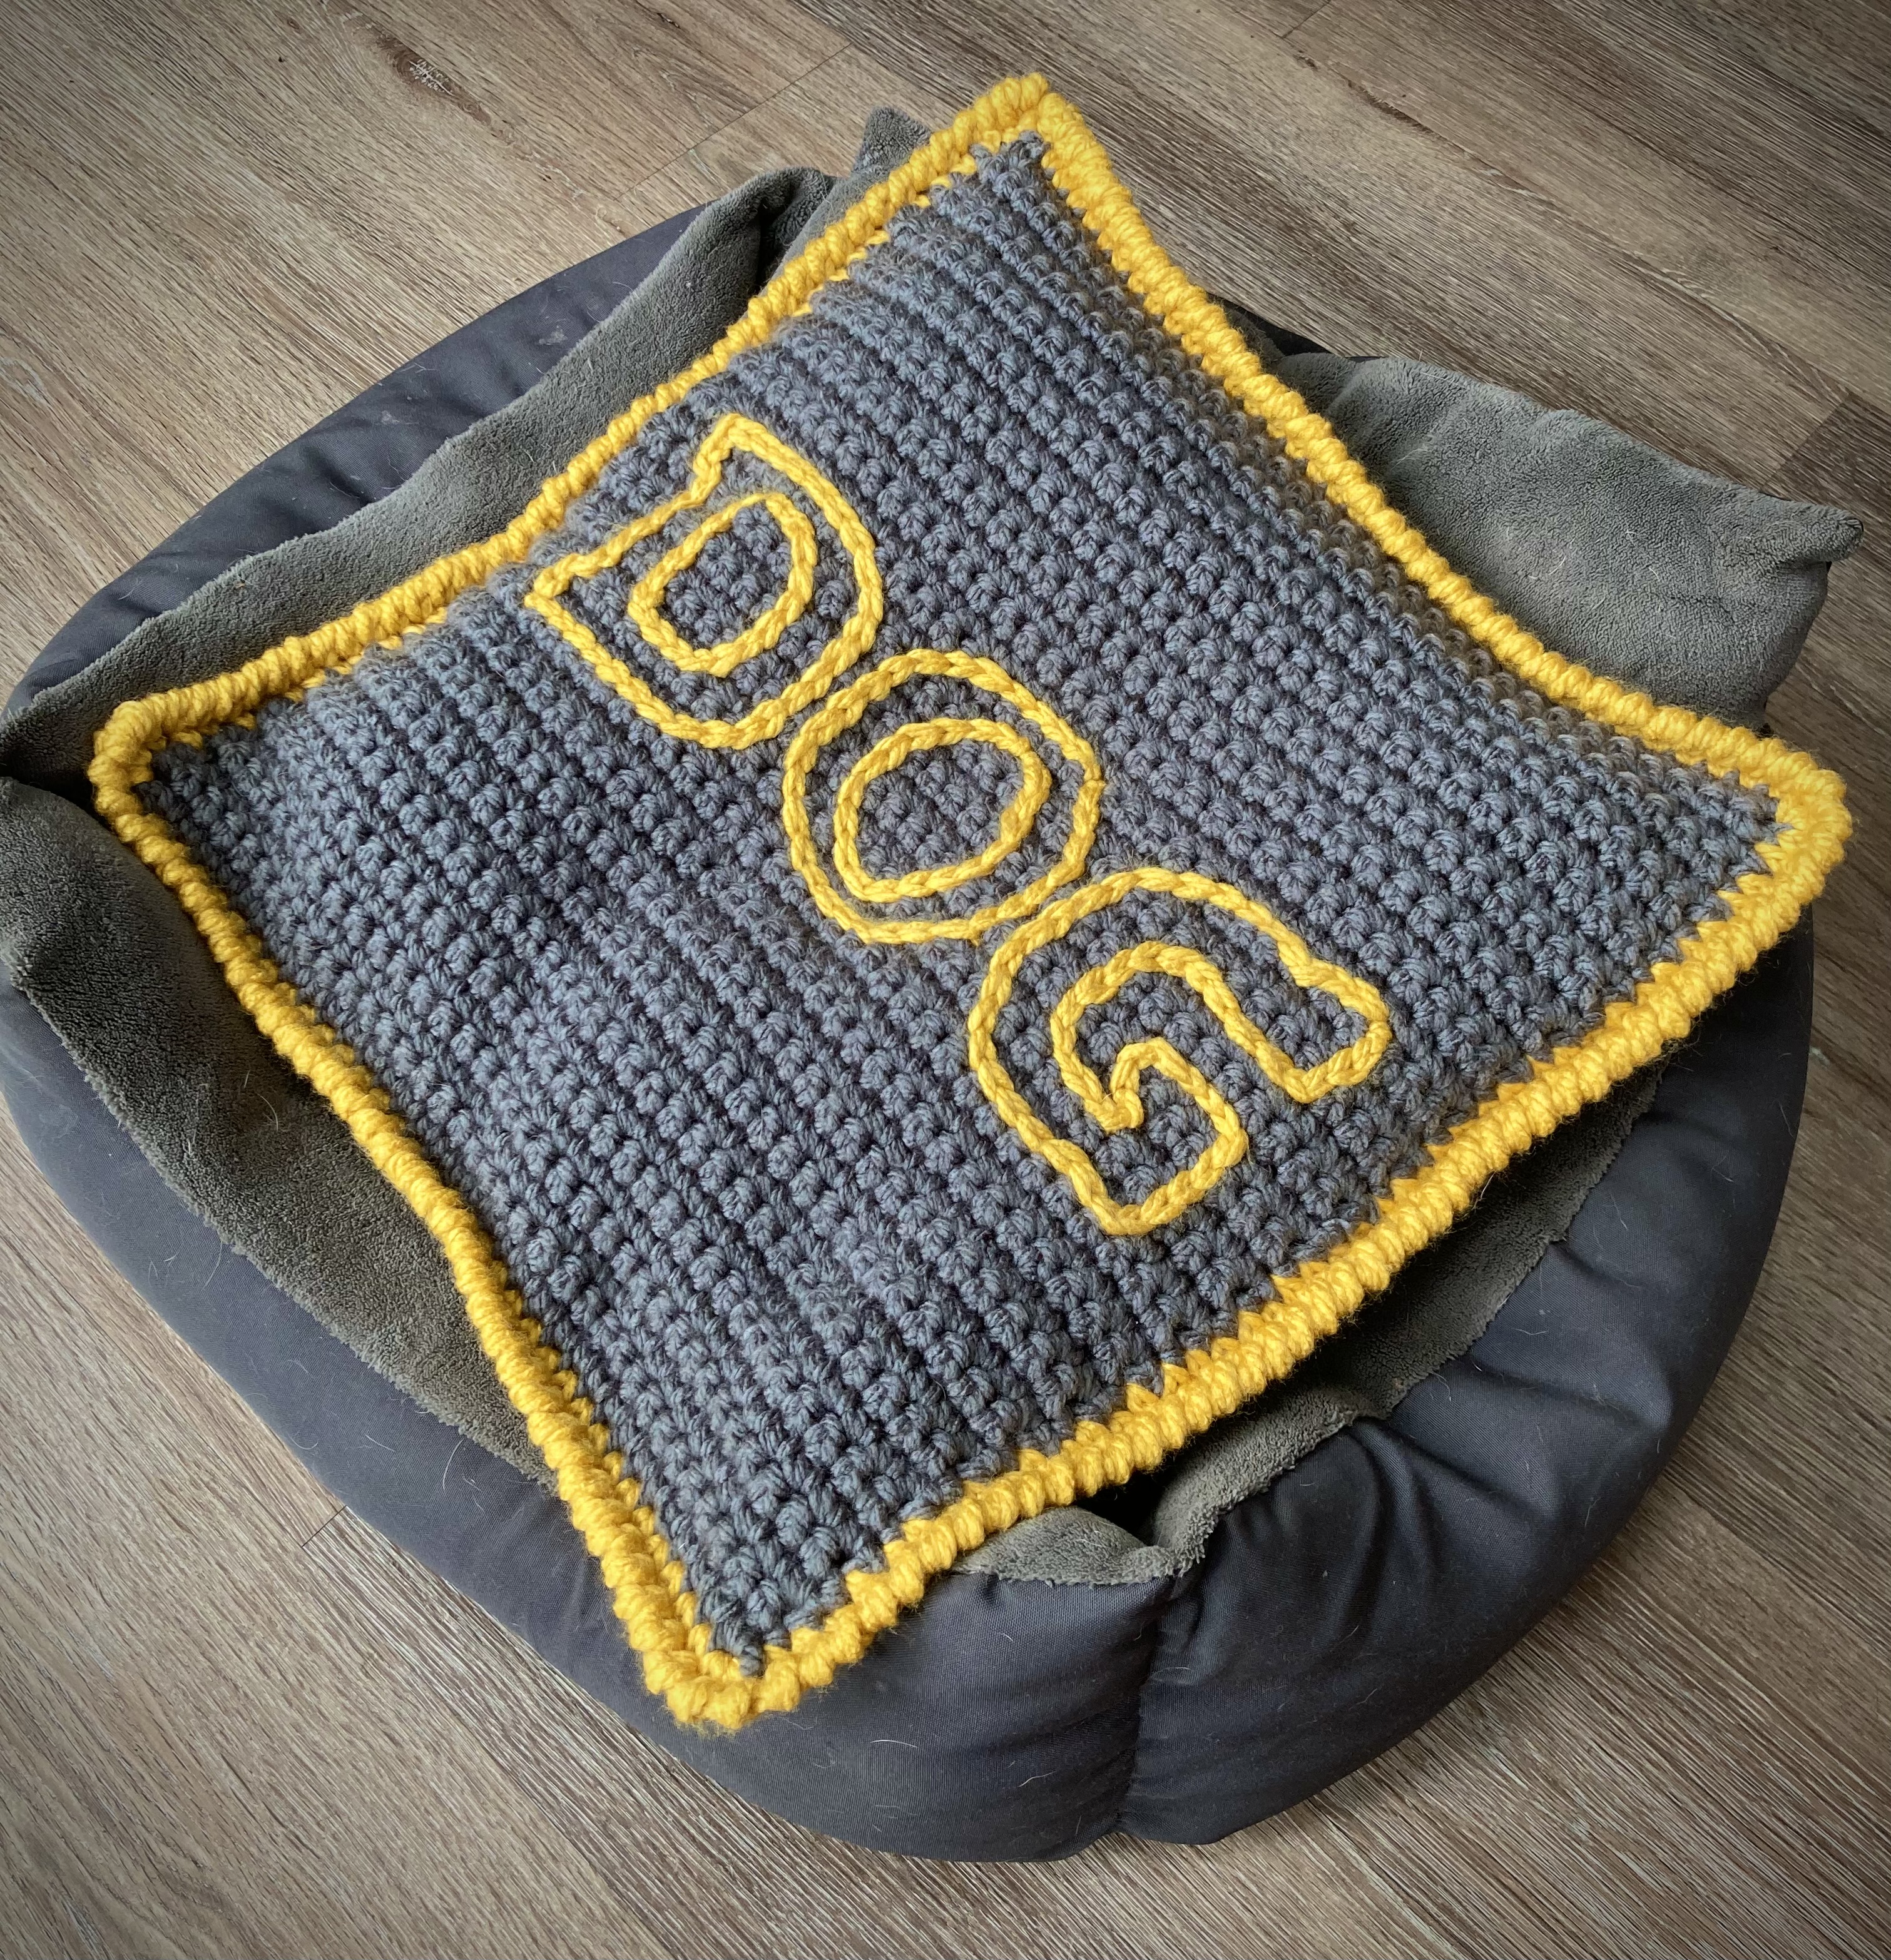
To make the dog cushion, I used Stylecraft Special XL yarn. As it’s 100% acrylic, it’s easy to wash and care for.
Colours used in photo
Colour A – 3060 Graphite x 3 200g balls and
Colour B – 1823 Mustard x 1 200g ball
8mm Hook
If video tutorials are more your thing, check out this one for my puffed chevron crochet bag, this is another great beach bag! It’s the only one I use when I go shopping too.
Sizing and Gauge
This pattern is just one size, to fit a 45cm cushion pad.
Gauge – 8 stitches x 9 rows in pattern = 10cm square

I’ve also designed this cute little bandana, for dogs, cats and humans! You can get it in my Etsy shop,
Grab it here:
Stitches Used
Ch – Chain (UK Ch- Chain)
Sc – Single Crochet (UK Dc – Double Crochet)
Slst – Slip stitch (UK slst)
Rsc – Reverse single crochet (UK Rdc – Reverse Double Crochet) also known as crab stitch – see video tutorial below.
Follow my Facebook Page for more crochet news


Pattern notes
The front and back panels are worked entirely in single crochet, the embroidery is added to the front panel before the front and back panels are joined together. Scroll down to see a video tutorial for the embroidery technique.

Front Panel
Ch 36 in colour A
Row 1 – sc in 2nd ch from hook. Sc in each ch along. Turn
Rows 2-42 – ch1 (doesn’t count as a stitch), sc in each sc along. Turn
Fasten off.

Back Panels – Make 2
Ch 36 in colour A
Row 1 – sc in 2nd ch from hook. Sc in each ch along. Turn
Rows 2-26 – ch1 (doesn’t count as a stitch), sc in each sc along. Turn
Fasten off.

DOG Embroidery
Follow the chart to position your DOG embroidery on the right side of the front panel using colour B and 8mm hook. Slip stitch on the surface of the front panel, pulling tail ends through to the wrong side.
Each + on the crochet chart denotes a single crochet stitch. See video tutorial below for a clear guide to using slip-stitch as embroidery.

Subscribe to my YouTube channel, for lots more great FREE crochet stitch tutorials like this one! Don’t forget to click on the ‘bell’ to be notified each time I post.
Join the Panels
Lay your back panels onto the front panel with WRONG sides together (note, you will not turn the cushion cover through, but rather work an edging to hide the seams). You may wish to position the foundation chain of each back panel on the overlap edge, rather than placing them on the outer edge, this will make joining the seams easier.
The back panels should overlap by approximately 10 rows. Secure all 3 layers with large eye needles (used as pins) to prevent the panels from moving while you join the seams.
Edging Row 1 – Using colour B, Join your yarn at one of the side seams and sc in each row-end through all layers. Make sure you catch in all the layers, especially where the 3 layers overlap. This is quite tricky but not impossible! Continue to work in sc, placing 2sc in the last stitch of each side to allow for turning the corners. Do not fasten off.
Row 2 – Rsc in each sc around to create the rope effect piping, pulling any tail ends from the other panels to the inside of the cushion cover as you go. Slst to first rsc. See video below for a guide to reverse single crochet / crab stitch.
- New Year Crochet Pattern Sale

- Quick & Easy Textured Crochet Cowl Free Video Tutorial

- Quick & Easy Crochet Xmas Bunting – Tutorial Video

- Wrapped Arrow Stitch Beanie FREE Pattern

- My Handmade Wardrobe Free Crochet Patterns

Finishing
Fasten off leaving a long tail and sew in. Pull all remaining tail ends inside the cushion. Insert your 45cm cushion pad.
The 10 row overlap should be sufficient to hide the cushion pad, but you can add sew on press-studs if you prefer.
Here’s another great crochet stitch! Basket weave is my ‘go to’ pattern for blankets and cushion covers. You can create lots of different patterns just by altering the number of stitches and rows.
I really hope you enjoy making your dog cushion and I’d love to see pics of your makes. Just hop onto any of my social media channels below, or join my Facebook group to add your photos, comments or questions!


Subscribe to You Can Crochet Newsletter
Get free tutorials, tips and tricks to your inbox every month. Unsubscribe any time.
Thanks
Rach x
Leave a Reply